IT'S WINTER, a good time to bake bread. If you’ve never made bread before, this is a basic training lesson, and if you’re experienced, consider this a refresher. Both are presented here with tips and lessons that you will never see in recipes.
First, this is a long-rise/short-work/no-knead method that starts three days before baking day. For almost all that time the dough chills in the refrigerator, developing elastic gluten and fermenting into delicious flavor.
Basic ingredients
4 cups water at room temperature, 3 tablespoons olive or other vegetable oil, 1½ tablespoons kosher salt, 1 teaspoon dry yeast, and about 7 cups of bread flour, either white or whole wheat
High-protein bread flour (12-16% protein) is essential. While the dough sits, wheat proteins bind together to build long elastic strands. The gluten bonds together to form a balloon-like surface that stretches over the carbon-dioxide and steam bubbles produced by fermenting yeast and evaporating water. That’s why yeasted breads are not dense as bricks. Elastic gluten also builds cohesion, so you can slice bread without it crumbling. You can add small amounts (1 cup) of other flours, like corn, rye, barley, or buckwheat for flavor. These are optional; none has enough gluten to work in bread alone.
Instructions
Start by pouring all the liquids into a deep bowl. Add the salt and yeast and half of the bread flour. Mix this into a slurry. Add other flours if you are using them, and then mix in enough more bread flour to make a soft dough, the consistency of drop cookie batter. Cover the bowl tightly and refrigerate. Your bread journey has begun.
Turn and fold the dough every twelve hours for two days. Here’s how:
Get your hands wet to keep them from getting sticky. Lift one edge of the dough mass. Stretch it up and over and then press it into the opposite side. Repeat this turn-and-fold process about four times, working your way around the bowl. Notice the dough changing as you repeat this process. At first the dough will be shaggy and tear. Then it becomes progressively more elastic and stretchy. You can see the gluten strands developing!
Timing: You could mix the dough on Thursday night, fold and stretch Friday and Saturday, and Sunday could be baking day.
On baking day you’ll have a bowl full of risen dough, stretchy, sticky and springy. Sprinkle the surface with flour and, using your hands, tuck that flour down around the sides of the dough. Sprinkle your work surface with flour. Sprinkle two baking sheets with flour. Pour the dough out onto the floured work surface. Scrape out the mixing bowl and set it in the sink to soak.
This recipe makes about 64 ounces of dough. For practice we’re going to divide this into 16 four-ounce pieces. I recommend using a kitchen scale (a very handy tool!), but you can just eyeball it. Cut the dough with a knife. Then dust each piece with a little flour and set them to the side of your work surface.
Take each piece of dough and form it into a tight balloon, using a bit more flour on the surface to keep it from getting sticky. Work toward forming a tight ball by folding the dough in on itself and pinching the bottom together, aiming for a smooth top and a pinched, puckered bottom. Lightly oil this little balloon and place it, puckered side down, on the baking sheet. Repeat with all your cut dough pieces. Cover with a damp towel or plastic wrap and allow them to rest for at least 30 minutes at room temperature.
Forming and cooking
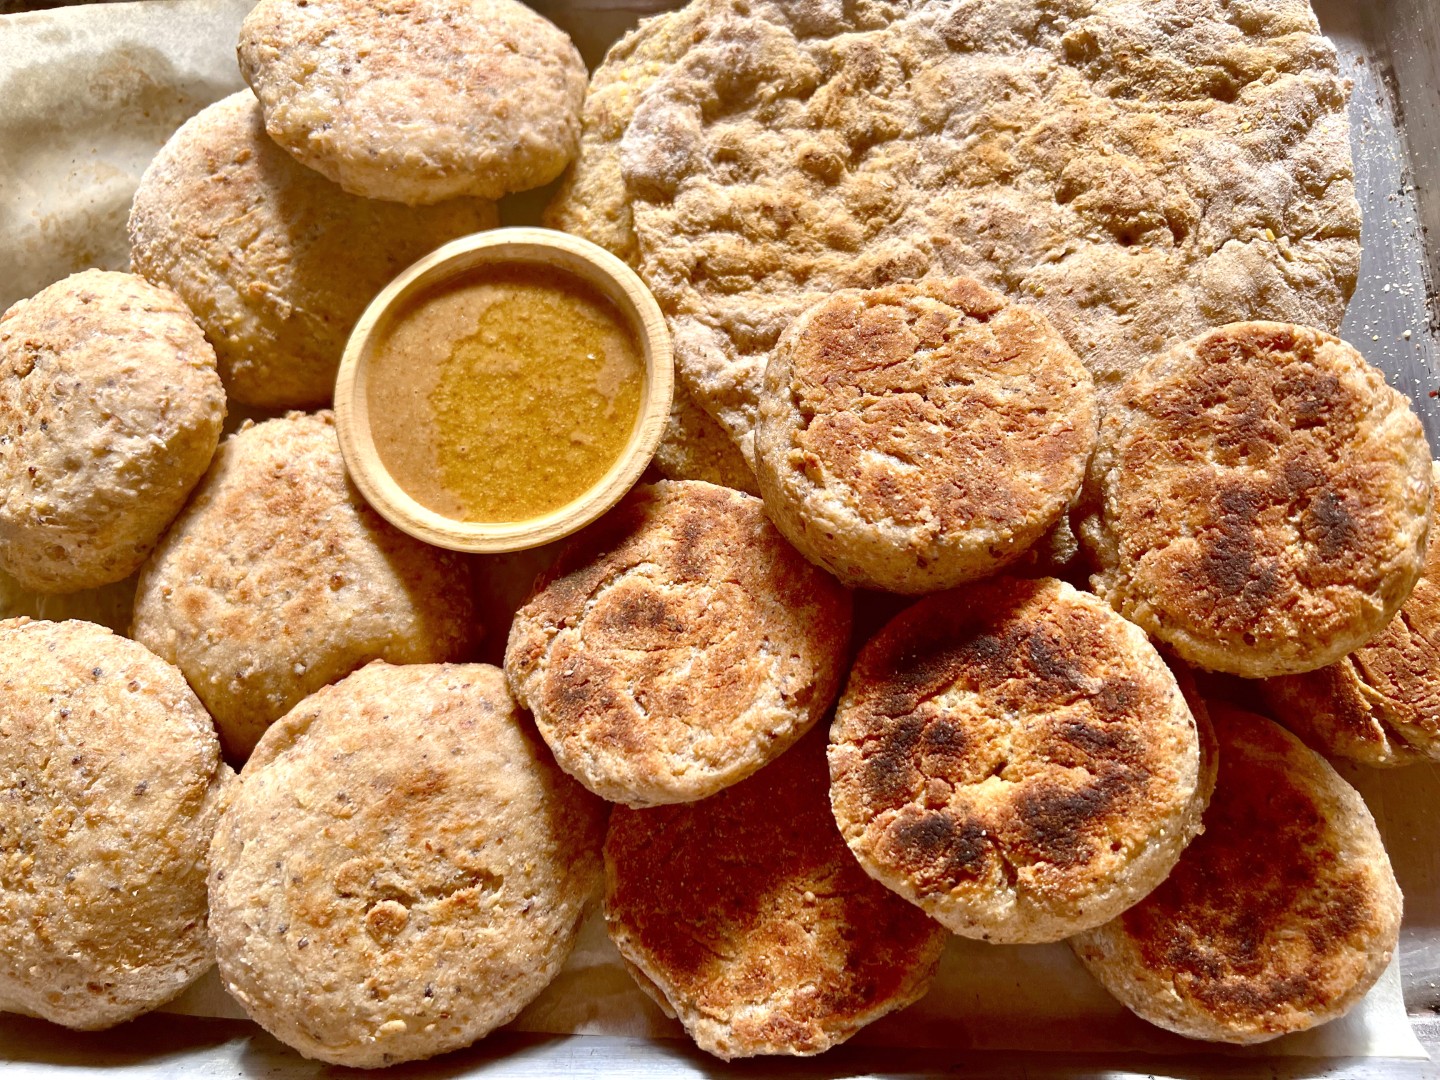
For the Basic Bread Training experience we’re making flatbreads both on the stove and in the oven, English muffins on the stove, and rolls in the oven. Preheat your oven to 400 degrees. Heat a heavy skillet (preferably cast iron) over medium-low heat.
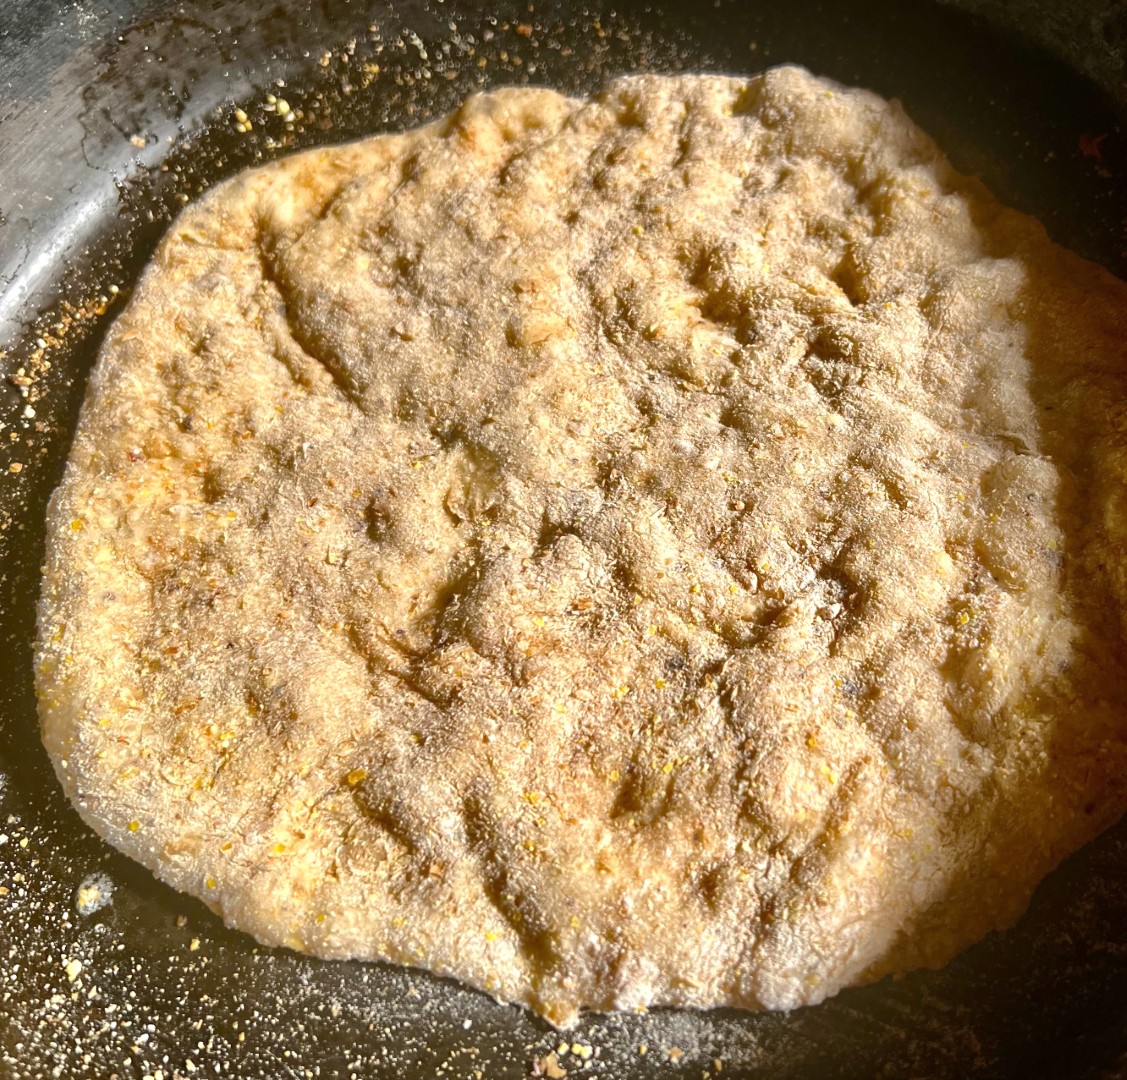
Start by making flatbreads. Working on a flour-dusted surface, take one dough ball and pat it into a thin round (about ¼ inch). Lightly dust with flour if needed to keep it from sticking. Transfer this flatbread to the skillet. After a few minutes the dough will show bubbles; flip it to cook the other side. You want gentle brown spots on both sides. Remove to a plate and cover with a towel. Repeat. At the same time you can make a few oven flatbreads. Use the same procedure for forming them. Put them on a baking sheet covered with a sheet of parchment paper, and bake them in the hot oven till they puff, about eight minutes.
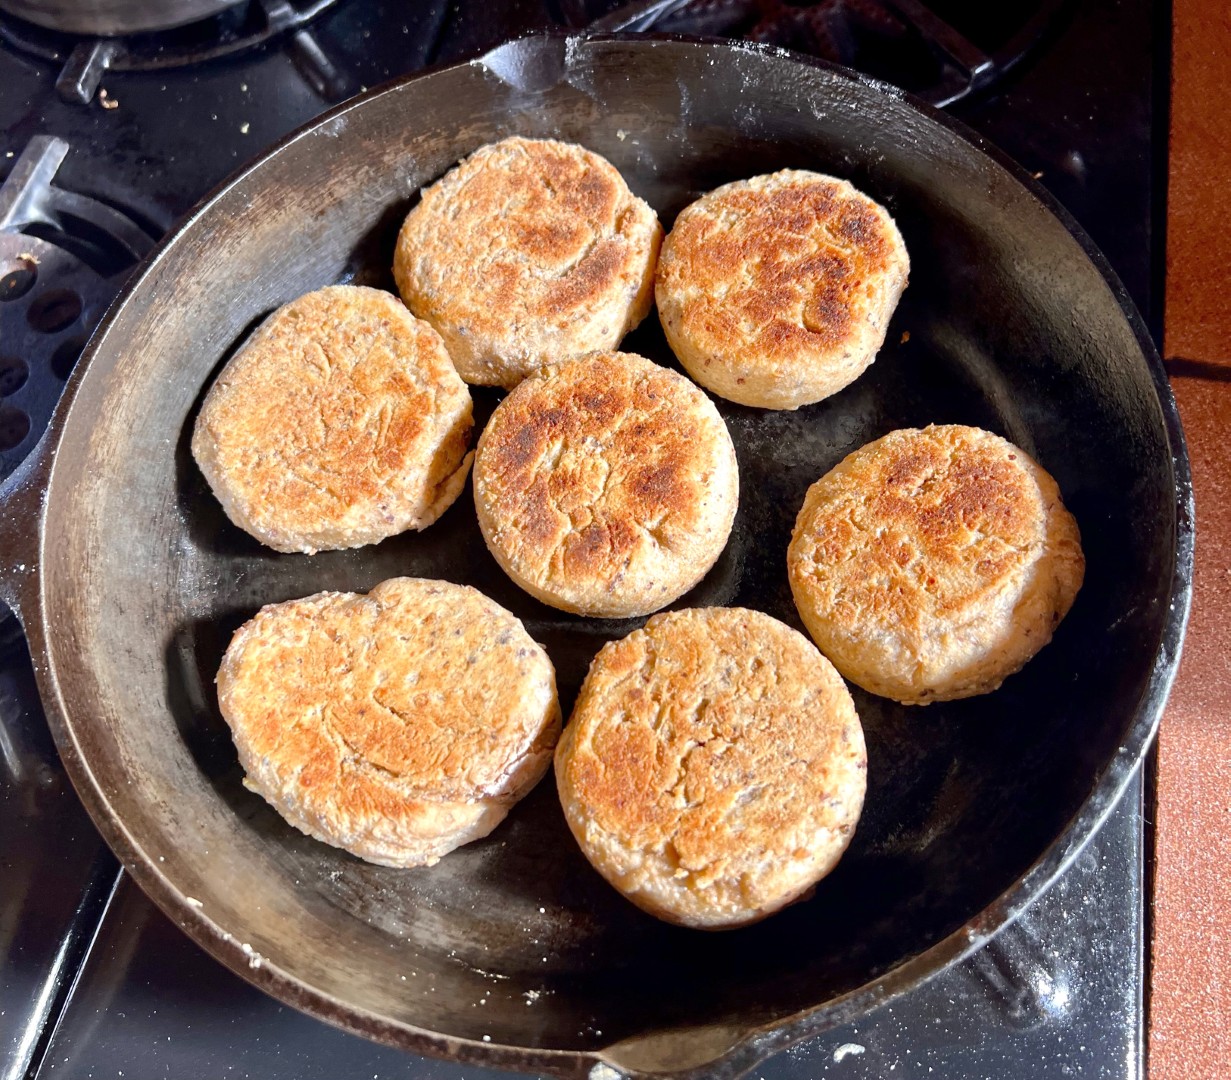
Next make English muffins. Use half the remaining dough balls. Pat them down with your fingers to one inch and move them onto the medium-hot skillet. Several can sit side-by-side. After about eight minutes check the bottoms for browning, and turn them over. Look for nice browning on both sides. If you see burned spots, turn the heat down. They are done if when poked, the sides bounce back and do not hold the imprint. Remove them to cool in a pile.
Bake the rest of the doughballs as rolls. Leave them as is, round, tight balls, and transfer them, pinched side down, to a baking sheet lined with parchment paper. Brush them with oil and bake them till the bottoms are nicely browned and the tops slightly browned, about twelve minutes. Remove from oven and brush them with oil again to make a soft crust.
That’s it! You’ve experienced the mix, the feel and the bake for a variety of yeast breads. This is basic training for making loaves. Think of loaves as big rolls, so practice again, making larger and larger rolls.
I recommend you enjoy your freshly baked breads with amalou, a luscious Moroccan almond drizzle.
For 1½ cups of amalou you need a halfpound of raw almonds, 1 teaspoon salt, ½ cup olive, walnut or avocado oil, and ¼ cup of thin honey.
Toast the almonds in a microwave for 30 seconds at a time till they are lightly browned. Check after each timing to assure a light toast (mine take two minutes). Grind the almonds and salt in a food processor to a very smooth mass. Then slowly add the oil and honey, a tablespoon at a time. The mix should be runny. Add more oil if needed. Serve at room temperature with your delicious freshly baked bread — smackdown delicious!
Want more training? I’m teaching a Yavapai College Community Ed Crash Course on baking breads this spring. Call the Community Ed office at Yavapai College for information: 928-717-7755.
Chef Molly Beverly is Prescott's leading creative food activist and teacher. Photos by Gary Beverly.
